Do you know how to add a Mailchimp popup to Shopify? If you’re not
asking visitors to subscribe to your email list, you’re ignoring a
powerful marketing method that can help you make more sales.
In this tutorial, we’re going to teach you, step-by-step, how to add a Mailchimp popup to Shopify so you can increase sales, grow your email list, and engage with your visitors to build important relationships.
An eCommerce email marketing strategy will help you turn new visitors into customers, and encourage existing customers to become repeat customers. That’s why adding a Mailchimp popup for Shopify is one of the best ways to form a relationship with your audience.
You can make your signup form even more appealing by providing a lead magnet for your new subscribers.
Even better, you won’t have to mess about with code to create your campaigns. OptinMonster integrates easily with both Shopify and Mailchimp, so it just takes a few clicks to set it up.
You can grab your visitors’ attention with our wide range of attractive templates to make your email signup boxes really pop. Check out our popup gallery to see some examples.
And, since the more targeted your campaign is, the better your chances of getting signups, you can use OptinMonster to get really specific about who sees your marketing campaign depending on your customers’ device, location, previous actions, and much more.
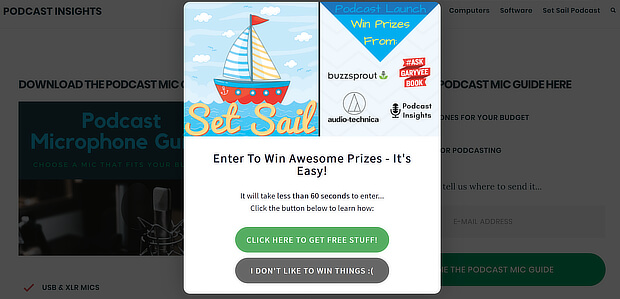
EczemaCompany.com saw their signups multiply 2.5x after switching from another provider’s exit-intent popups, and Podcast Insights used Exit-Intent® to engineer a 1099% increase in downloads of their lead magnet.
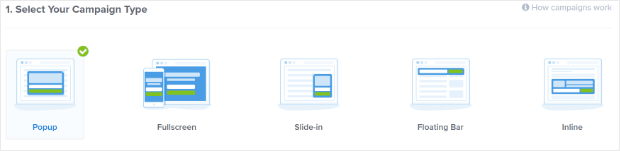
Choose a campaign type. We’re using the Popup campaign which, as you’ll see later, has converted well for OptinMonster customers, especially when combined with our Exit-Intent® display rule.
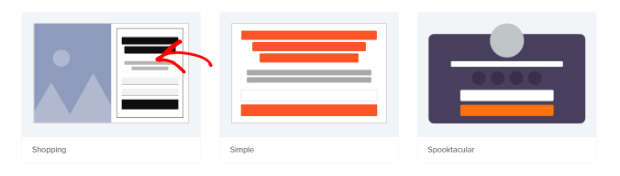
Choose from one of OptinMonster’s flexible, fully customizable templates. We’re using Shopping.
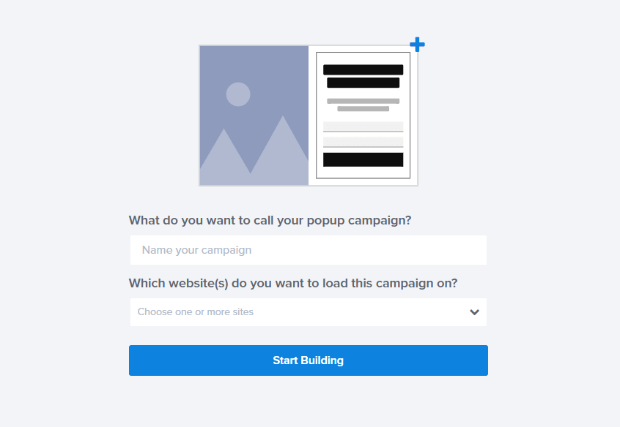
Give your campaign a name and press Start Building.
This will take you to the OptinMonster campaign builder, where you will see the default Shopping campaign.

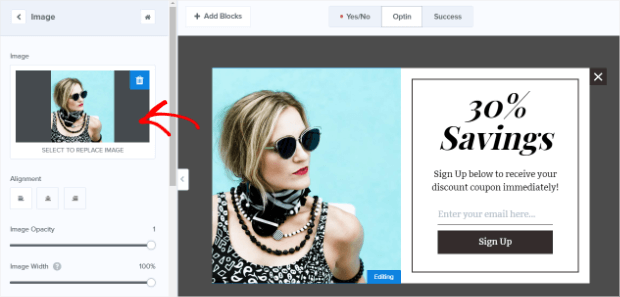
Next, it’s time to edit the Mailchimp Shopify Integration. You can change the default image by click on the image in the campaign preview. Editing tools will appear to the left.
We’re going to keep the default image because we like it, but if you are stuck for image inspiration, try our list of places to find free images online.
Click on the headline text in the campaign preview. Again, editing tools will appear to the left. Replace that with a headline that’s more appropriate for your email marketing campaign.
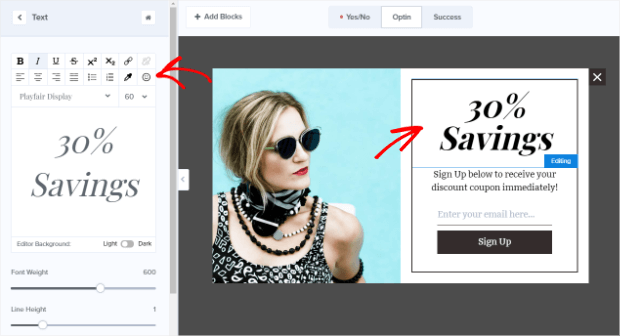
You can also use the same method to edit the body text. Use the editing tools to fix text formatting and color as desired.
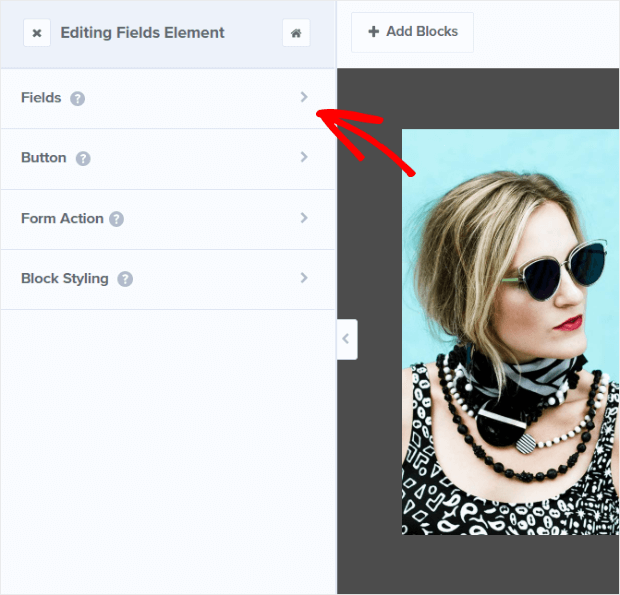
Click on the email address field to open editing tools for the Fields Element. From here you can access editing tools for Fields, Buttons, Form Actions, and the Block as a whole.
Click on Fields in the editing tools. Change the text as needed.
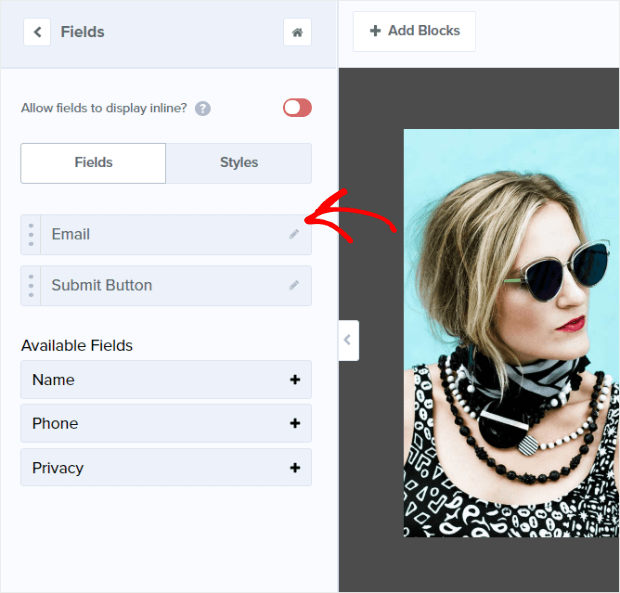
You can change the text formatting from the Styles section of the editing tool.

Next, choose when your Shopify Mailchimp signup form will display. Go to the Display Rules tab.
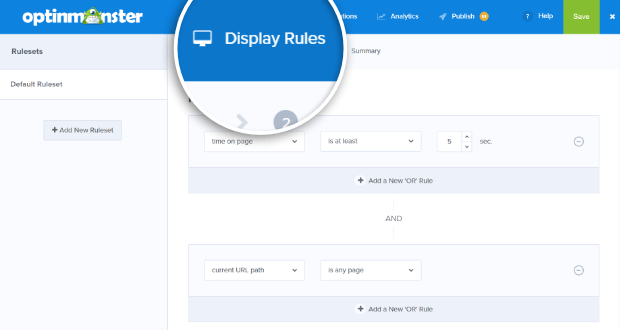
By default, OptinMonster enables the time on page display rule. This is a great way to ensure every visitor sees your campaign.
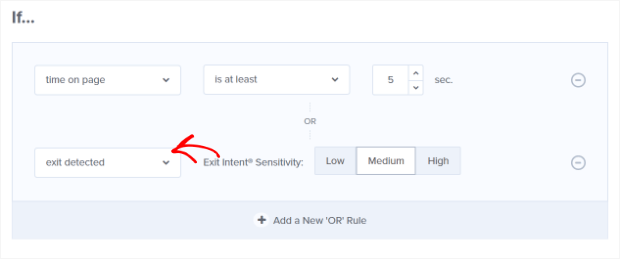
It’s also a good idea to make sure visitors get one last chance to subscribe before they leave your Shopify store. To do that, we recommend you enable Exit-Intent®. This powerful display rule detects when visitors are about to click away so it can pop up your subscription form just before they do.
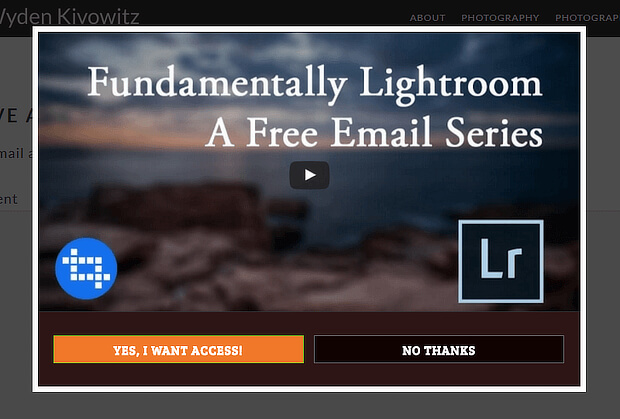
Exit-Intent is one of our most popular and successful display rules and is proven to convert. Ryan Robinson used the technology to boost signups by 500%, and Scott Wyden Imagery was able to triple their email list.
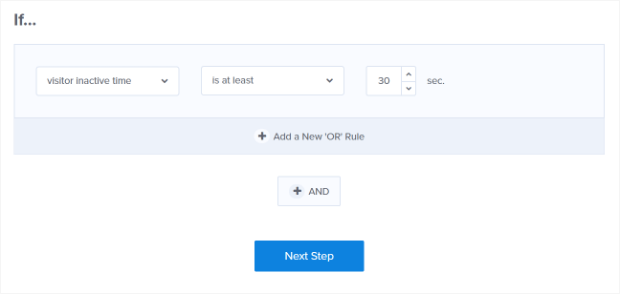
How to Get Exit-Intent® in a Mobile Popup
If you’re creating a mobile-specific popup, you can still get a similar effect to Exit-Intent® by using InactivitySensor™ (Seconds of Inactivity). Your campaign will show when visitors on mobile devices stop taking action for a while.
How to Target Your Most Engaged Visitors
If you want to get subscriptions only from website visitors who’ve shown they’re interested in your content (and therefore are more likely to buy in the future), then there are two OptinMonster display rules that help you to do this.
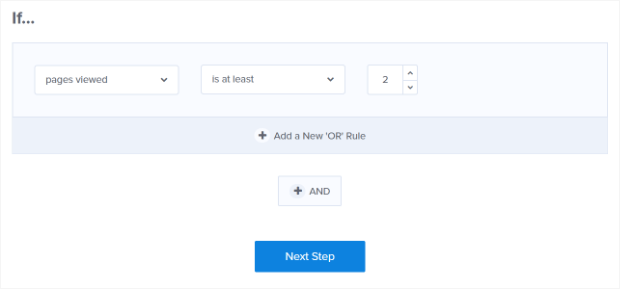
One option is to enable the pages viewed display rule, to target your campaign to visitors who’ve already looked at a couple of pages and are therefore interested in your store.
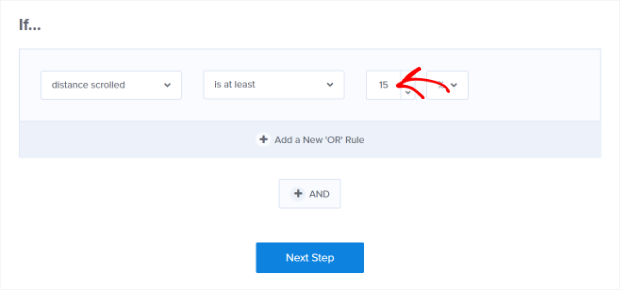
Another option is to show campaigns only to visitors who have demonstrated their interest by scrolling a certain distance down the web page. To enable this set the distance scrolled display rule. This is set at 15% but you can increase that even more to target more engaged visitors.
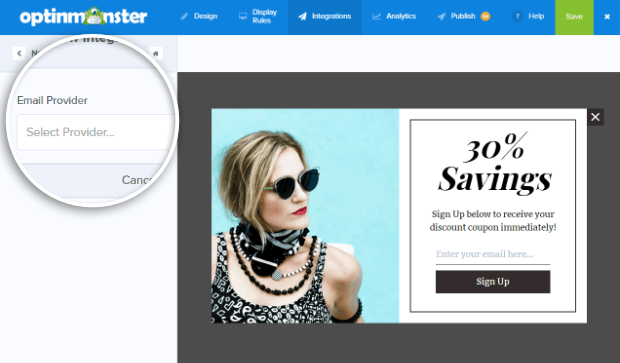
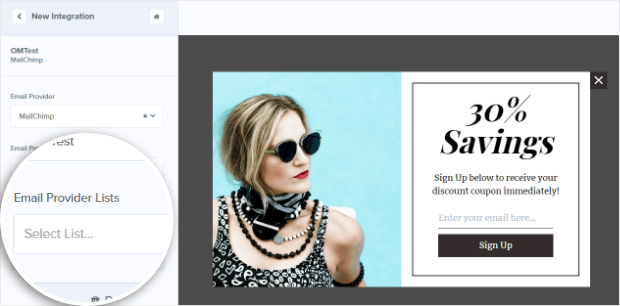
Go to Integrations » Add New Integration » Email Provider, and select Mailchimp from the dropdown list.
Next, choose your account in the Email Provider Account box that appears below.
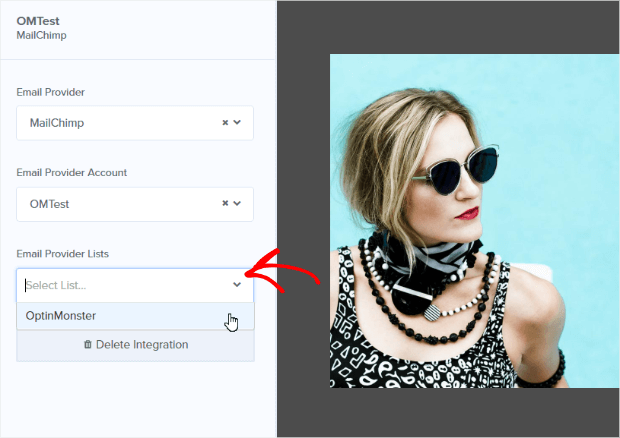
You’ll then see a new box: Email Provider Lists.
Choose the list you want to use with your campaign from the dropdown list.
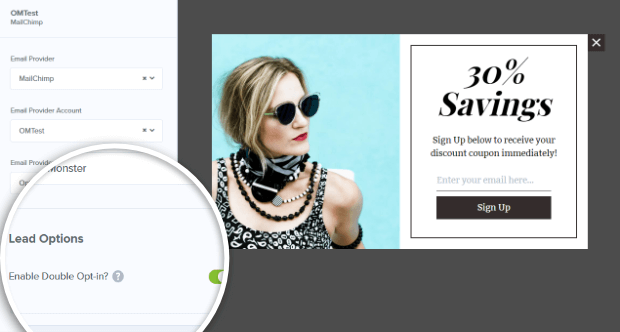
Then the Lead Options box will appear. You’ll be able to choose whether you want to enable Double Opt-In. (Here’s a comparison of single vs. double opt-in to help you decide.)
That’s all you need to do to ensure new subscribers who sign up via your campaign get added to your list.
First, make sure you have connected OptinMonster to Shopify with our app.
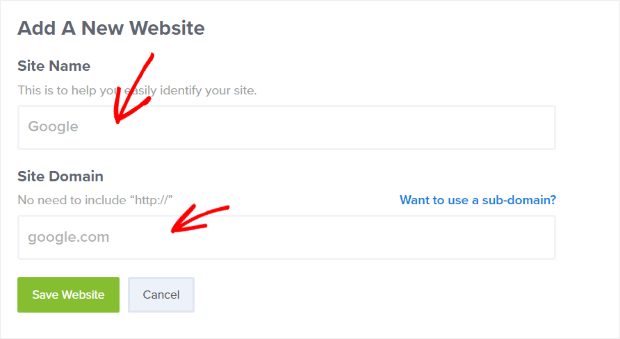
Then go to Publish » Add a new website.
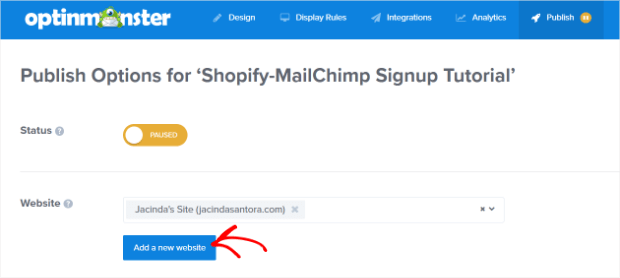
Enter a site name and the URL for your Shopify store.
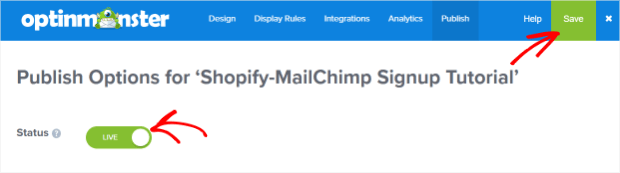
Save your campaign and click toggle the Status from Paused to Live.
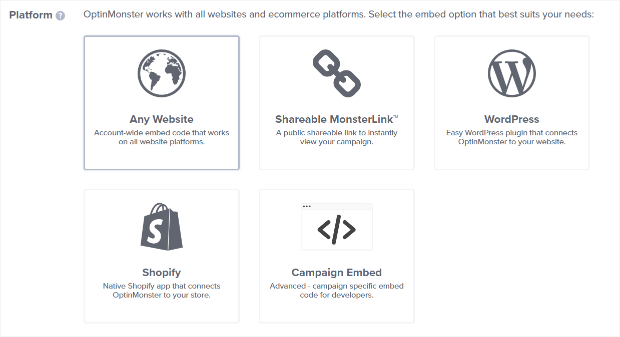
There are several publishing options to choose from.
Originally Published at optinmonster.com
In this tutorial, we’re going to teach you, step-by-step, how to add a Mailchimp popup to Shopify so you can increase sales, grow your email list, and engage with your visitors to build important relationships.
Why You Need a Mailchimp Popup for Shopify
Email is still one of the best ways to reach anyone. The latest email marketing statistics show that more than 90% of people still use it.
An eCommerce email marketing strategy will help you turn new visitors into customers, and encourage existing customers to become repeat customers. That’s why adding a Mailchimp popup for Shopify is one of the best ways to form a relationship with your audience.
You can make your signup form even more appealing by providing a lead magnet for your new subscribers.
Why Use OptinMonster for Your Shopify Mailchimp Signup Form?
Here’s some more good news: you don’t need a special Mailchimp popup for Shopify app to create your popup.
Even better, you won’t have to mess about with code to create your campaigns. OptinMonster integrates easily with both Shopify and Mailchimp, so it just takes a few clicks to set it up.
You can grab your visitors’ attention with our wide range of attractive templates to make your email signup boxes really pop. Check out our popup gallery to see some examples.
And, since the more targeted your campaign is, the better your chances of getting signups, you can use OptinMonster to get really specific about who sees your marketing campaign depending on your customers’ device, location, previous actions, and much more.
EczemaCompany.com saw their signups multiply 2.5x after switching from another provider’s exit-intent popups, and Podcast Insights used Exit-Intent® to engineer a 1099% increase in downloads of their lead magnet.
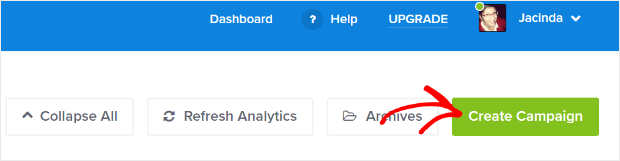
1. Create a Campaign
Choose a campaign type. We’re using the Popup campaign which, as you’ll see later, has converted well for OptinMonster customers, especially when combined with our Exit-Intent® display rule.
Choose from one of OptinMonster’s flexible, fully customizable templates. We’re using Shopping.
Give your campaign a name and press Start Building.
This will take you to the OptinMonster campaign builder, where you will see the default Shopping campaign.
2. Edit the Campaign
Next, it’s time to edit the Mailchimp Shopify Integration. You can change the default image by click on the image in the campaign preview. Editing tools will appear to the left.
We’re going to keep the default image because we like it, but if you are stuck for image inspiration, try our list of places to find free images online.
Click on the headline text in the campaign preview. Again, editing tools will appear to the left. Replace that with a headline that’s more appropriate for your email marketing campaign.
You can also use the same method to edit the body text. Use the editing tools to fix text formatting and color as desired.
Click on the email address field to open editing tools for the Fields Element. From here you can access editing tools for Fields, Buttons, Form Actions, and the Block as a whole.
Click on Fields in the editing tools. Change the text as needed.
You can change the text formatting from the Styles section of the editing tool.
3. Set Display Rules
Next, choose when your Shopify Mailchimp signup form will display. Go to the Display Rules tab.
By default, OptinMonster enables the time on page display rule. This is a great way to ensure every visitor sees your campaign.
It’s also a good idea to make sure visitors get one last chance to subscribe before they leave your Shopify store. To do that, we recommend you enable Exit-Intent®. This powerful display rule detects when visitors are about to click away so it can pop up your subscription form just before they do.
Exit-Intent is one of our most popular and successful display rules and is proven to convert. Ryan Robinson used the technology to boost signups by 500%, and Scott Wyden Imagery was able to triple their email list.
How to Get Exit-Intent® in a Mobile Popup
If you’re creating a mobile-specific popup, you can still get a similar effect to Exit-Intent® by using InactivitySensor™ (Seconds of Inactivity). Your campaign will show when visitors on mobile devices stop taking action for a while.
How to Target Your Most Engaged Visitors
If you want to get subscriptions only from website visitors who’ve shown they’re interested in your content (and therefore are more likely to buy in the future), then there are two OptinMonster display rules that help you to do this.
One option is to enable the pages viewed display rule, to target your campaign to visitors who’ve already looked at a couple of pages and are therefore interested in your store.
Another option is to show campaigns only to visitors who have demonstrated their interest by scrolling a certain distance down the web page. To enable this set the distance scrolled display rule. This is set at 15% but you can increase that even more to target more engaged visitors.
4. Choose Your Mailchimp List
Next, we’ll make sure to add your Shopify customers to Mailchimp lists.Go to Integrations » Add New Integration » Email Provider, and select Mailchimp from the dropdown list.
Next, choose your account in the Email Provider Account box that appears below.
You’ll then see a new box: Email Provider Lists.
Choose the list you want to use with your campaign from the dropdown list.
Then the Lead Options box will appear. You’ll be able to choose whether you want to enable Double Opt-In. (Here’s a comparison of single vs. double opt-in to help you decide.)
That’s all you need to do to ensure new subscribers who sign up via your campaign get added to your list.
How to Add a Mailchimp Popup to Shopify
Finally, it’s time to publish your Shopify Mailchimp signup form.First, make sure you have connected OptinMonster to Shopify with our app.
Then go to Publish » Add a new website.
Enter a site name and the URL for your Shopify store.
Save your campaign and click toggle the Status from Paused to Live.
There are several publishing options to choose from.
Originally Published at optinmonster.com


No comments:
Post a Comment